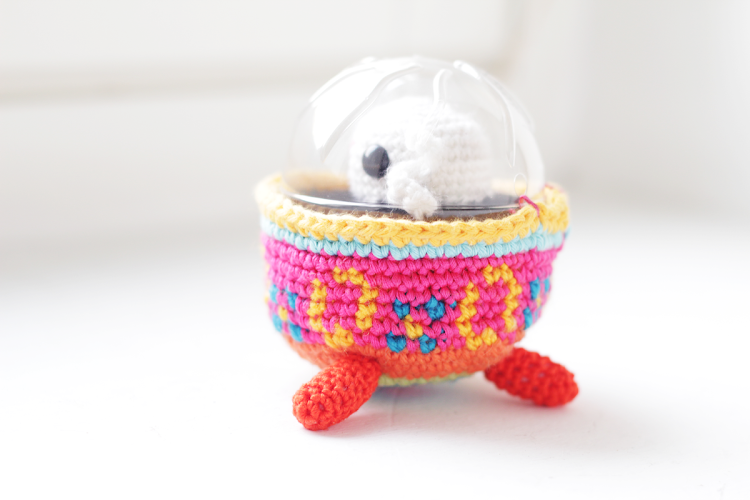
Free Easter Bunny in colored Egg Spaceship Amigurumi pattern
Easter is approaching and we wanted to try something very different this year, that is why while daydreaming I got the idea of making an Easter Egg Spaceship. The adventurous Bunny took his spaceship and came to earth to see how people are, coincidentally he arrived in Easter time and people confused his sophisticated vehicle with an Easter egg. He got invited inside and ate as much as he could! He liked it so much that he actually stayed. Now his Spaceship is the sensation in the hood. I made a couple of sketches and started creating it. This time you will be using Jaquard technique, which means creating a graphic with your yarn. It is very similar to Fair Isle technique.
The Amigurumi patten is hopefully easy to follow. You will learn how to follow an advanced pattern as well as how to crochet with different colors. In this pattern you will make use of recycled materials and learn how to use felt in Amigurumis. You can use this pattern to create your own handmade safe toys, key chains, bag decorations, nursery decorations or Easter decorations.
Did you know that Egyptians, Persians, Phoenicians, and Hindus believed that the world began in a big egg? The eggs are a symbol of rebirth and new life, therefore it is widely used during Easter celebrations.

For this Amigurumi you will need:
Black Pressed felt 4 mm
Pink Yarn 4 mm.
Orange yarn 4 mm.
Baby blue yarn 4 mm.
Green yarn 3 mm.
Yellow yarn 4mm.
Turquoise yarn 4 mm.
White yarn 4 mm.
Tapestry needle.
1 pair of Amigurumi eyes ( I am using 8 mm)
Fiberfill stuffing.
A Hook of 4 mm.
A piece of carton.
This is a 3 Star pattern


Egg

With pink yarn
Round 1: 6 sc in magic ring (6 sts)
Round 2: 2 sc in each sc around (12 sts)
Switch to blue yarn
Round 3: [2 sc, sc in next st], around (18 sts)
Round 4: [2sc, sc in next 2 sts], around (24 sts)
Switch to green yarn
Round 5: [2 sc, sc in next 3 sts],around (30 sts)
Round 6: [2 sc, sc in next 4 sts], around (36 sts)
Switch to orange yarn
Round 7: [2 sc, sc in next 5 sc], around (42 sts)
Round 8: [2 sc, sc in next 6 sc], around (48 sts)
Round 9: [2 sc, sc in next 7 sc], around (54 sts)
Start with the Jacquard pattern

Round 10: [(Pink sc), (Yellow sc in next 2 sts), (Pink sc in next 2 sts), (Turquoise sc in next st), (Pink sc in next st), (Turquoise sc in next st), (Pink sc in next st)] around (54 sts)
Round 11: [(Yellow sc in next st), (Pink sc in next 2 sts),(Yellow sc in next st), (Pink sc in next 2 sts), (Yellow sc in next st), (Pink sc in next 2 sts)] around (54 sts)
Round 12: [(Yellow sc in next st), (Pink sc in next 2 sts),(Yellow sc in next st, (Pink sc in next st), (Turquoise sc in next st), (Pink sc in next st), (Turquoise sc in next st), (Pink sc in next st)] (54 sts)
Round 13: [(Yellow sc in next st), (Pink sc in next 2 sts),(Yellow sc in next st, (Pink sc in next 5 sts)] around (54 sts)
Round 14: [(Pink sc), (Yellow sc in next 2 sts), (Pink sc in next 6 sts)] around (54 sts)
Round 15: Sc around (54 sts)
Switch to baby blue yarn
Round 16 to 17: Sc around
Switch to yellow yarn
Round 18: Sc around (54 sts)
Fasten off, add fiberfill stuffing

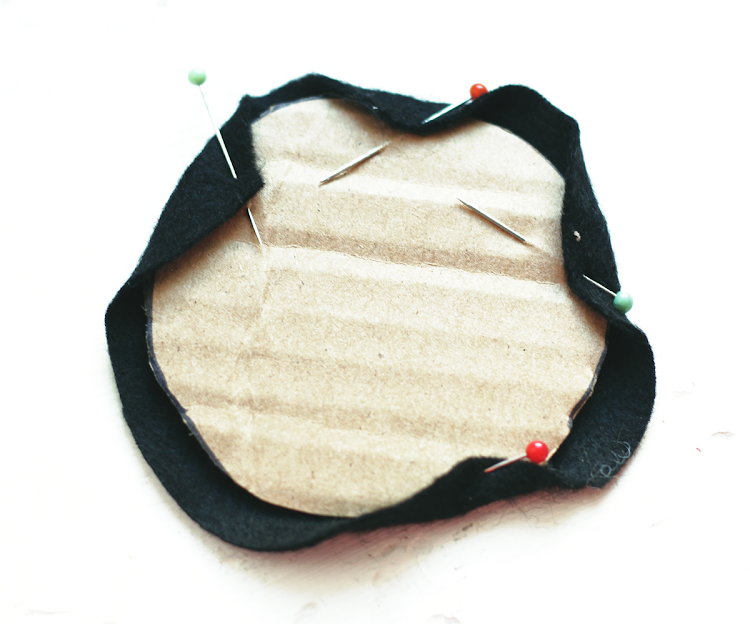
Black flat surface
Cut a circle in carton that measures about 7,5 cm in diameter.

Place it on top of the filled egg, adjust it until it fits.

Once you are sure that the carton circle fits perfect in the half egg, take the piece of black pressed felt and place your carton circle on top. Cut a similar circle but make it 1 to 2 cm bigger. You can glue or sew it to the cardboard piece.

Place the black circle on top of the half egg and sew the sides to the egg.

Spaceship Egg legs (Make 3 with orange yarn)

Round 1: St 5 into mr (5 sts)
Round 2: 2sc around (10 sts)
Round 3 to 11: Sc around (10 sts)
Fasten off, leave a tail for sewing.
Stuff the legs
Sew them to the egg with a tapestry needle.
The Dome
For the dome I recycled the top of an ice cream. The ice cream I used is called Jättis but I am pretty sure you will find a similar one in your home country. Some yogurts and other products have similar shapes.
Make two holes in the back side of your dome and
sew it to the back side of your half egg.
Easter Bunny Cosmonaut
We will only make the head. And then sew it to the black surface. This way it will look like the bunny coming through the surface.
Bunny (white yarn)
Round 1: Sc 6 into mr (6 sts)
Round 2: 2sc around (12 sts)
Round 3: [2 sc, sc in next st], around (18 sts)
Round 4: [2sc, sc in next 2 sts], around (24 sts)
Round 5: [2 sc, sc in next 3 sts],around (30 sts)
Round 6 to 11: Sc around (30 sts)
Place the eyes and embroider a little pink mouth.
Fasten off, weave the ends.

Bunny Ears(make two with white yarn)
Ch 14, sc in each st, fasten off and sew them to the head.
Sew the Bunny on top of the black felt with matching thread.

You are done!

We Hope you enjoyed making this fun Amigurumi. Comment below and tell us what you think of this tutorial.
We love your comments(◕‿-)!


